Screening Assistant 2 v1.1
Graphical User Interface (GUI)
Last edited: 02/11/2011
By: VLG
Sourceforge: SA2 website
Help: SA2 forums
Documentation index
This page will provides fairly comprehensive overview of the Graphical User Interface (GUI) of SA2. You will learn how windows are organized, how actions are arranged in menus, and which are the main windows you will work with...
Table of Contents
- General overview
- Menu Bar
- Toolbar
- Viewing single molecules
- Viewing multiple molecules
- The Selection window
- Database management windows
- Other windows
General overview - top
There are three main areas in the GUI: the Menu bar, the ToolBar and the main Desktop area. All windows will be displayed in the Desktop area. Their relative position can be changed however you like by dragging and dropping windows into different locations.
Once you open a database, a set of windows be opened and positionned automatically. When running SA2 for the first time, a default layout will be setup.You can of course rearenge the position of all windows. The following screenshot shows you an example of what we use in our lab.

Note that when you close SA2 and reopen it, the previous layout will be setup.
Menu - top
Just like usual desktop applications, the menu bar contains shortcuts to all available features in SA2. The most important menus are the following:
- File: All actions related to input / output are available from this menu (importing SDF files, exporting molecules / properties...).
- Database: Various miscanelous actions / views related to the database management (e.g. adding a new table, a new provider...).
- Compute: All specific, usually time-consuming actions can be accessed from her. They include chemical space calculations, similarity searching, substructure searching, creation of new libraries...
- Windows:
In this menu, you will be able to open pretty much all window available in
screening assistant. The following sub-menus are available:
- Database - All windows related to the database management. You can also find these windows in the Database top menu
- Molecule - All windows that display information on a single selected molecule (e.g. the 2D structure, the scaffold...
- MoleculeS - All windows that display several molecules (tables, plots...).
- Statistics - Various statistics views.
- Output - Open the output window. This is where various output messages will be displayed when importing molecules, computing new chemical spaces...
There are also other less important menus:
- View: In this menu, you can reorganize the toolbar as you like, open additional toolbars that are not visible by default (such as the memory toolbar). Not that some of these additional toolbars are not usefull or cannot even be used (these are Netbeans-related actions that has been kept just in case they become usefull later on). The most important thing here is the IDE log window that can be opened. If you experience any bug, crash or unexpected window that open, you should open the IDE log window, and copy and paste the last messages in your bug report.
- Tools: In this menu, you will be able to manage pluggins, and options available in SA2. Currently, there is not specific options available, except that you can simply define your shortcuts for specific actions, tell netbeans to use a proxy...
- Help: Get helps and basic information on SA2.
Toolbar - top
The tool bar is just a set of shortucs to windows / actions that are usually used. Pass your mouse over each button to get a short description of the underlying action.
Only two things are worse to note:
-
The very first button allows you to disconnect from the current database (and therefore
close all currently opened windows), and open the connection window.
- You probably noticed a text field in the middle of the toolbar. This text field allows you to perform simple name-searches. Type a name (or the part of a name) in the field, and press Enter (or the button on the left of the text field). A window will open in the central area of the GUI, showing the results of the search.
Viewing single molecules - top
There is a set of windows available to display the information related to a particular molecule that would have been selected in whatever other window. Because we are not necessarily interested in ALL information available for each molecule, and because we have a limited place on our screen, we decided to create various views that can be opened or not to display a particular information on a selected molecule. Here they are:
-
Window->Molecule->2D structure
Displays the 2D structure of the selected molecule.
-
Window->Molecule->3D structure
Displays the 3D structure of the selected molecule (using the OpenAstex viewer).
-
 Window->Molecule->Scaffold and
Window->Molecule->Framework
Displays the scaffold / framework of the selected molecule, as well as the number of molecules associated it. Furthermore, you can perform the same operations as described in the Selection window; here, the molecules considered by these operation will be all molecules associated with the scaffold / framework. Opening these views, you can thus easily create a library or delete all molecules that belongs to the scaffold of your selected molecule.
-
 Window->Molecule->Associated Libraries and
Window->Molecule->Associated Providers
Displays all the Libraries / Providers this molecule belongs to. Using these windows, you can easily create / remove association between a Provider / Library for the selected molecule.
-
Window->Molecule->Properties -
Displays the properties (by Property tables) of the current molecules. Missing property will result in a blank cell. All properties, except the Basic Properties, can be edited in this window.
-
Window->Molecule->List of IDs -
Displays the database IDs and all original IDs that are associated with the selected molecule.
Viewing multiple molecules - top
There is also of course a set of windows that allows you to view more than one molecule. In all these view, when you select a single molecule, all the views will be updated to display the information associated with this particular molecule. When you select multiple molecules, another selection mecanism is used, making use of a particular window called the Selection window. Although it can be viewed as a window allowing to view multiple molecules too, we will descibe it later in a dedicated section.
-
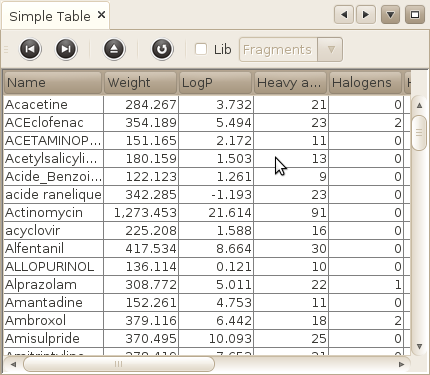
Window->MoleculeS->Basic table
Displays the name and the basic properties of your molecules in a simple table. The table does not display all the molecules, but rather a subset of 1000 molecule. You can navigate to the next / previous 1000 molecules using the navigation buttons in the toolbar of the table.
You can also sort the molecules using any of the basic properties (If you have thousands of hundreds, or millions of molecules, don't expect this to work very fast!! ), or display only the molecules that belong to a particular Library.

-
Window->MoleculeS->Flags table
Displays all binary flags in a simple table using a basic colouring scheme. The following flags are currently coloured:
Lipinski's rule of 5: red if the molecule is flagged as non-lipinski, white otherwise. RO3 flag: blue if the molecule is flagged as being a fragment, white otherwise. Reactive flag: red if the molecule is flagged as reactive, white otherwise. Warhead flag: red if the molecule is flagged as warhead, white otherwise. PAINSm150 flag: red if the molecule is flagged as PAINSm150, white otherwise. PAINSl150 flag: red if the molecule is flagged as PAINSl150, white otherwise. PAINSl15 flag: red if the molecule is flagged as PAINSl15, white otherwise.
The exact same operations as for the Basic table can be performed in this view.

-
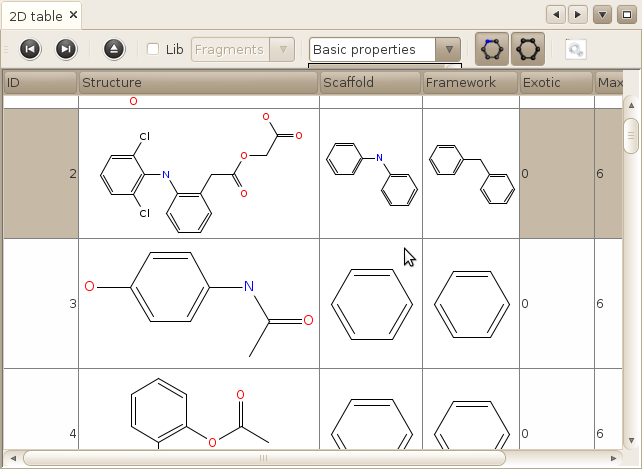
Window->MoleculeS->2D table
Another table, showing directly the structure of the molecule and the properties associated with this molecule for a particular table. You can also display the scaffold and the framework of the molecule directely in this table. You can also display tables of properties associated with each molecule, and select a particular subset of properties to display.
Aside of these features, the functionalities are roughly the same as for the two preceeding tables, except that we only display 100 molecules at time in this table.
Note that the 2D coordinates are not calculated on the flight. It means that if you have imported your molecules in 3D, the depiction will not be very sexy.

-
Window->MoleculeS->Plot->Interactive XY Plot
An interactive plot allowing you to plot your molecules in 2 dimensions using any property available in the database. There is a specific tutorial dealing with this view.
-
Window->MoleculeS->Plot->Interactive DRCS Plot
An interactive plot, quite similar to the XY plot in terms of vizualisation and plotting / colouring facilities, except that you plot your molecule in a Delimited Reference Chemical Space (DRCS), which is basically a PCA-based chemical space computed on a specific sets of descriptors. The documentation about DRCS is not written yet; we are waiting for the official article to be published. Untill then, you can still play with it. You will find important similarities with the XY plot window.
The selection window - top
In simple table as well as in various plotting facilities, you have the possibility to select interactively one or several molecules. When doing so, the full list of selected molecules will appear in the Selection window, usually located in the right of the main SA2 window. There are two important things to highlight on this feature.

Synchronize the selection
As shown in the previous screenshot , a small checkbox makes it possible for the selection process to be synchronized. It simply means that when a set of molecules has been selected in a particular view, all other views will be notified that the selection has changed, and will select these molecules in their own view.
Please be carefull with this. Don't expect the selection process to be very fast if you are displaying hundreds of thousands of molecules in e.g. a simple property plot.
Do something with selected molecules
On the left of the Selection window, you can see a set of buttons. These buttons allow you to perform some action on the set of molecules that are currently selected and displayed in the Selection window. Currently, you can add these selected molecules to a given library, create a new library based on these molecules, or delete these molecules.
Note that if you don't select any particular molecule in the Selection window, all the molecules listed will be considered in the action you will trigger. If however, you have selected one or several molecules in the list, only these molecules will be considered. This is also true for all the search results windows.
Database management windows - top
Various windows allow you to perform administration or even more advanced operations
on your database. These windows are available in the Database menu.
They usually represent the information as simple list / tree.
In each case, a left click on each entity will popup a menu that will allow you to perform
various operations. In most cases, a Properties menu-item will also be available, in which you
will be able to view basic information and even edit some of them (e.g. names,
descriptions...).
-
Database->Providers->List of providers
Opens a window that simply display the full list of providers available iun the database. You can edit the name and the description of a provider, and you can delete all molecules of a given provider.
Note that this process will delete the Provider as well, and is irreversible!
-
Database->Libraries->List of libraries
Opens a window that simply display the full list of libraries that have been created so far. You can edit the name and the description of each library, delete one particular library (removing just the association between the molecules and this library), or actually delete the molecules associated with a particular library. You can also compute the composition of the library in terms of providers.
-
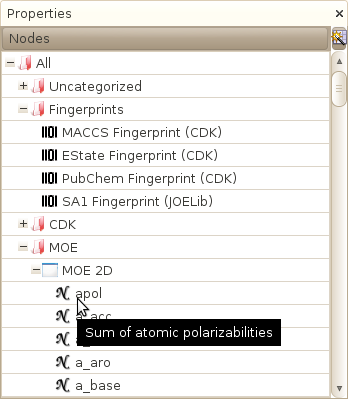
Database->Properties->List of properties
Opens a window that display the hierarchy of Property tables available in the database. In this window, you can create new categories, add a new table or a new property in an existing table, add a new fingerprint, delete an existing table...
Important note: if you delete a table or a property, all information related to this property, including all DRCS chemical spaces, will be removed as well!
Important note: if you remove a Category, all tables that belong to this category will be moved to the Uncategorized tables category instead of being deleted.
-
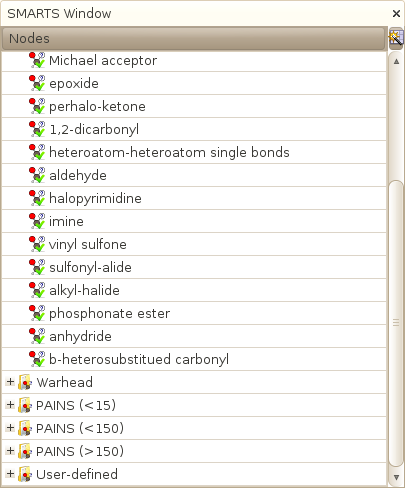
Database->SMARTS flags->List of SMARTS
Opens a window that display the full list of SMARTS that are used to compute the various HTS flags available in SA2. Each SMART can be desactivated or removed from the database. You can also add your own SMARTS.

Other windows - top
- The Histogram window
- The Reporting window